

Hello, Welcome back. Glad that you’re here.
We're building a Movie App with the best coding practices and tools. Till now in UI, we've made HomeScreen, Navigation Drawer, and About Dialog. Now, let's work on Movie Detail Screen. This will be a longer tutorial than compared to others.
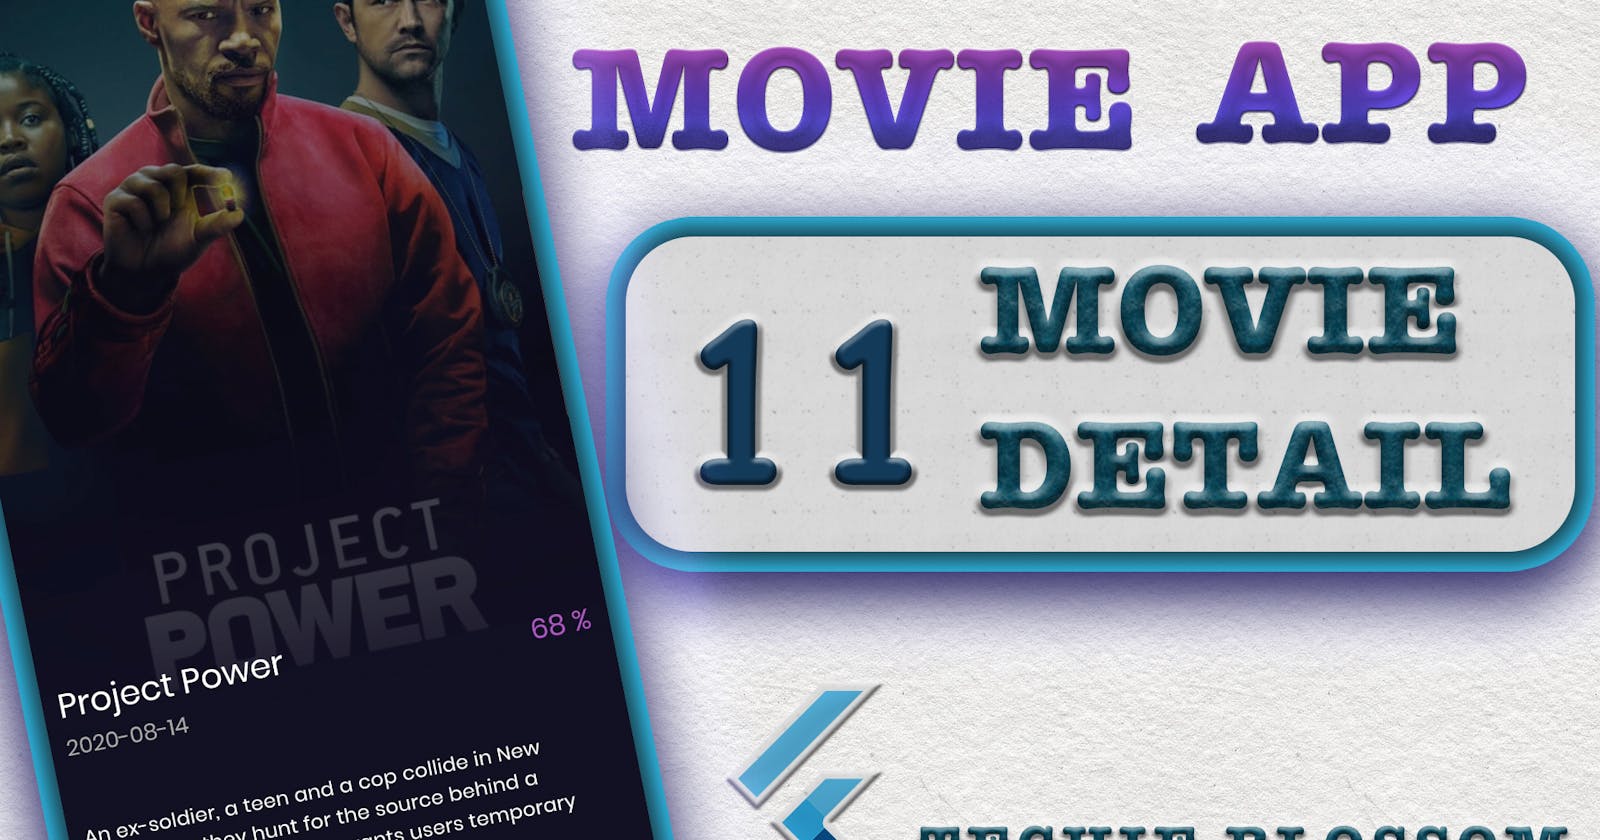
You'll land on the movie detail screen from 3 places. Tap on Movie Card from Home Screen, Search Screen, and Favourite Movies Screen.
On Movie Detail Screen, you'll see AppBar with a back icon and favorite icon, which is a toggle icon. We will save movies in the local database in future tutorials so right now, I'll only place the icons in without giving action on tap.
Then, we will have a big poster of the movie, followed by Title and Description of the movie. To keep this tutorial to a specific topic, I will create a separate tutorial for cast and trailers in movie details.
Let's start coding.
Domain Layer
Whenever we design any screen, we should think of the data that it will display. As in the case of Movie Detail Screen, we will show details of any selected movie. As you already know from our previous tutorials, the domain layer consists of entities, abstract repository, and usecases.
Entity (Request & Response)
From Data Source, we will get the movie detail by hitting an API. We will get so many unwanted fields from the data source, but the entity must not have all those fields. An entity should only have the fields that are required to show in UI or that are part of some further API calls.
Let's create a request and response entity keeping the domain only in mind. In the domain/entities folder, create a new file movie_params.dart:
class MovieParams extends Equatable {
  final int id;

  const MovieParams(this.id);

  @override
  List<Object> get props => [id];
}
- To fetch the movie details, we require a movie id. This class acts as a data holder for request parameters that are required to call the movie detail API.
In the domain/entities folder, create a new file movie_detail_entity.dart:
class MovieDetailEntity extends Equatable {
  //1
  final int id;
  final String title;
  final String releaseDate;
  final String overview;
  final num voteAverage;
  final String posterPath;
  final String backdropPath;

  const MovieDetailEntity({
    this.id,
    this.title,
    this.releaseDate,
    this.overview,
    this.voteAverage,
    this.posterPath,
    this.backdropPath,
  });

  //2
  @override
  List<Object> get props => [id];
}
- If you look at the data on Movie Detail Screen, you can see we need
title,releaseDate,overview,voteAverage, andbackdropPath. You will also need id and posterPath in the future, so let's add them too. - Let's consider that id will be enough to compare two movie detail objects if required.
Repository
When we are ready with the request and response entity, we can create an abstract method in the abstract repository.
In the domain/repository folder, add a new method:
Future<Either<AppError, MovieDetailEntity>> getMovieDetail(int id);
- Here, we create a method that takes in an id and returns us with either an app error or a success object of
MovieDetailEntity.
UseCase
Now, let's make a use case that invokes this method. If you have seen previous tutorials, we are using use cases only in the Blocs.
Create a new use case in the domain/usecases folder:
//1
class GetMovieDetail extends UseCase<MovieDetailEntity, MovieParams> {
  final MovieRepository repository;

  GetMovieDetail(this.repository);

  //2
  @override
  Future<Either<AppError, MovieDetailEntity>> call(
      MovieParams movieParams) async {
    //3
    return await repository.getMovieDetail(movieParams.id);
  }
}
- Since we have already created some usecases before, so copy any one of them and change the name to
GetMovieDetail. The important thing here is that you define the response type and request type asMovieDetailEntityandMovieParamsrespectively. - The
callmethod works on these types, so change them as well with correct types. - Here, you'll make a call to
getMovieDetailinstead ofgetTrending.
We're done with the domain layer that easy and fast. Let's make the API call now via Data Layer.
Data Layer
If you open the data folder, you'll see errors in the repository folder. That's because we haven't implemented the method that we declared in the abstract repository class. Before resolving the error, let's first create the model class.
Model
A model class is the response model, that holds the parsed JSON from the API. If you remember, we use https://javiercbk.github.io/json_to_dart/ for creating the model class from JSON.
Let's copy the JSON for movie detail. Head on to https://developers.themoviedb.org/3/ and select MOVIES. On the right side, you can see the details. Put the API_KEY and any movie id. Hit the SEND REQUEST button and copy the response.
Paste this response in JSON2DART tool. Copy the generated code in a new file movie_detail_model.dart
The file is too long, please take it from Repo.
We have to make some modifications because sometimes based on JSON, the JSON2DART tool is unable to create proper subclasses. Make all the fields as final and make the fromJSON method as factory method now. You can refer to the DataSources tutorial for similar steps.
While you're doing these code changes, you will also extend the model with the entity and use the super constructor to fill in values in the entity instance.
Repository Implementation
Now, you can add the implementation of the repository method in movie_repository_impl.dart.
//1 & 3
@override
Future<Either<AppError, MovieDetailModel>> getMovieDetail(int id) async {
  try {
    //2
    final movie = await remoteDataSource.getMovieDetail();
    return Right(movie);
  } on SocketException {
    return Left(AppError(AppErrorType.network));
  } on Exception {
    return Left(AppError(AppErrorType.api));
  }
}
- Add the
asynckeyword in the method. - You'll create the
getMovieDetail()from the data source, which we will create in a moment. - Next, as we have done for other methods to maintain a level of abstraction, use the model instead of an entity.
DataSource
Now, we are at the final part of making the API call.
In the movie_remote_data_source.dart, add the abstract method and the implementation:
//1
Future<MovieDetailModel> getMovieDetail(int id);
//2
@override
Future<MovieDetailModel> getMovieDetail(int id) async {
  //3
  final response = await _client.get('movie/$id');
  //4
  final movie = MovieDetailModel.fromJson(response);
  print(movie);
  return movie;
}
- Add declaration in the abstract class
MovieRemoteDataSource. - Implement the method in
MovieRemoteDataSourceImpland addasync. - To fetch the movie details, you have to append
movie/$idto theBASE_URL. - Use
fromJson()ofMovieDetailModelto create model from JSON. Finally, return theMovieDetailModel.
Business Logic
In this case, we can create a Bloc even before we have our UI. Because, Bloc only depends on making API calls, and we have a use case already added. Let's create a bloc.
Movie Detail Bloc
Create bloc with name movie_detail. Add a new event in the movie_detail_event.dart.
//1
class MovieDetailLoadEvent extends MovieDetailEvent {
  final int movieId;

  const MovieDetailLoadEvent(this.movieId);

  @override
  List<Object> get props => [movieId];
}
- Declare
MovieDetailLoadEventclass extending theMovieDetailEvent. Declare a final fieldmovieIdand override theprops()method.
Now, in movie_detail_state.dart add some states
//1
class MovieDetailLoading extends MovieDetailState {}

//2
class MovieDetailError extends MovieDetailState {}

//3
class MovieDetailLoaded extends MovieDetailState {
  final MovieDetailEntity movieDetailEntity;

  const MovieDetailLoaded(this.movieDetailEntity);

  @override
  List<Object> get props => [movieDetailEntity];
}
MovieDetailLoadingfor showing the loader, that we will cover in future tutorials.MovieDetailErrorfor handling errors when returned from API or network.MovieDetailLoadedwill be emitted when the movie detail API has responded with a successfulMovieDetailEntityobject. As you will store the movie details in the entity, declare the final field and add it inpropsas well.
Now, handle the event and dispatch the state in the movie_detail_bloc.dart:
//1
final GetMovieDetail getMovieDetail;

//2
MovieDetailBloc({
  @required this.getMovieDetail,
}) : super(MovieDetailInitial());

//3
@override
Stream<MovieDetailState> mapEventToState(
  MovieDetailEvent event,
) async* {
  if (event is MovieDetailLoadEvent) {
    final Either<AppError, MovieDetailEntity> eitherResponse =
      await getMovieDetail(
      MovieParams(event.movieId),
    );

    yield eitherResponse.fold(
      (l) => MovieDetailError(),
      (r) => MovieDetailLoaded(r),
    );
  }
}
- As you need to make an API call using the use case, declare the final field of
GetMovieDetail. - Allow it to be passed it in the constructor also. We will declare all dependencies things in get_it.dart in a while.
- Handle the event in
mapEventToState. When you have an event as a load event, make the API call and store the response in theEithertype object. Use thefoldoperator to yieldMovieDetailErrororMovieDetailLoadedstate with movie details object.
Dependency Injection
We have declared a new use case and a bloc, let's put them in get_it.dart:
//1
getItInstance.registerLazySingleton<GetMovieDetail>(
  () => GetMovieDetail(getItInstance()));

//2
getItInstance.registerFactory(
  () => MovieDetailBloc(
    getMovieDetail: getItInstance(),
  ),
);
- Just like others, below all use cases, declare one more
GetMovieDetail. - And below all blocs declare a dependency for
MovieDetailBloc.
As I do it, I found that I have declared dependency for
MovieTabbedBlocin wrong way. We have given new instances of each use case in theMovieTabbedBlocconstructor. Instead, we should take fromgetItInstancedirectly. Update that like this:
getItInstance.registerFactory(
  () => MovieTabbedBloc(
    getPopular: getItInstance(),
    getComingSoon: getItInstance(),
    getPlayingNow: getItInstance(),
  ),
);
This way, we are not having 2 instances of GetPopular, GetPlayingNow, and GetComingSoon use case.
Screen
Movie Detail Arguments
As of now, we have 2 places from where we will navigate to the details screen.
- On tap of Carousel Card
- On tap of Tab Card
From both of these places, you will get the movie id. This id you have to transmit to the details screen. This should be straight-forward as you can directly pass the id in the MovieDetailScreen constructor.
At first, this seems easy and quick. But, we are talking about best practices, scalable and modular approach. Currently, you have only one parameter. What you would do when you have 10 parameters. You will not like giving 10 fields in the constructor.
For that, we will create a separate class that can have any number of arguments in the future.
We are entering a new journey, so create a folder in journeys and create
MovieDetailArgumentsclass in that folder:
class MovieDetailArguments {
  //1
  final int movieId;

  const MovieDetailArguments(this.movieId);
}
- Declare a field movieId, as that will be required to make the API call once we land on the screen. So, the main idea is when we tap on the movie card, we take the id to the detail screen and make an API call.
Now, we have the arguments. So, let's make the screen.
In the same folder, create a new file movie_detail_screen.dart:
class MovieDetailScreen extends StatelessWidget {
  //1
  final MovieDetailArguments movieDetailArguments;

  const MovieDetailScreen({
    Key key,
    //2
    @required this.movieDetailArguments,
    //3
  })  : assert(movieDetailArguments != null, 'arguments must not be null'),
        super(key: key);

  @override
  Widget build(BuildContext context) {
    return Container();
  }
}
- Create a
Statelesswidget, and add theMovieDetailArgumentsas the final field as the screen depends on this argument class. - Make this field as required so that we make sure that the screen doesn't get called without arguments by mistake.
- As this is a required field, let's also be assured that this will never be null. You might be thinking what happens when arguments are not null but the
movieIdin arguments is null. Well, theassertstatement can only take constants andmovieIdis not a constant. So, we cannot restrict this. But, in this case, API will return with an error and we will show the user with the appropriate error.
Before moving to UI, let's link this screen to the carousel card and tab cards.
Open movie_card_widget in home/movie_carousel folder and add the linking:
//1
Navigator.of(context).push(
  MaterialPageRoute(
    builder: (context) => MovieDetailScreen(
      movieDetailArguments: MovieDetailArguments(movieId),
    ),
  ),
);
- In the
onTapbody, add the linking. Use thepushmethod to push theMovieDetailScreenin the stack. You will also pass theMovieDetailArgumentsby usingmovieId.
Do this same thing in home/movie_tabbed for movie_tab_card_widget.dart. For now, we are using the
pushmethod ofNavigatorbut as we grow in future tutorials with more screens, we will usepushNamedbecause that is more maintainable.
Now, run the application and see what happens when we tap on movie cards. We will navigate to a white screen, that's because we have an empty container on the screen.
Main Layout
Finally, we are on UI.
In the
MovieDetailScreenadd the Bloc and handle the success, error states:
//1
class _MovieDetailScreenState extends State<MovieDetailScreen> {
  //2
  MovieDetailBloc _movieDetailBloc;

  @override
  void initState() {
    super.initState();
    //3
    _movieDetailBloc = getItInstance<MovieDetailBloc>();
    //5
    _movieDetailBloc.add(
      MovieDetailLoadEvent(
        widget.movieDetailArguments.movieId,
      ),
    );
  }

  @override
  void dispose() {
    //4
    _movieDetailBloc?.close();
    super.dispose();
  }

  @override
  Widget build(BuildContext context) {
    //8
    return Scaffold(
      //7
      body: BlocProvider<MovieDetailBloc>.value(
        value: _movieDetailBloc,
        //6
        child: BlocBuilder<MovieDetailBloc, MovieDetailState>(
          builder: (context, state) {
            //9
            if (state is MovieDetailLoaded) {
              return Container();
            } else if (state is MovieDetailError) {
              return Container();
            }
            return SizedBox.shrink();
          },
        ),
      ),
    );
  }
}
- First, make the
MovieDetailScreenasStatefulwidget, as we will get the instance ofMovieDetailBlocinstance and dispose of it here itself. - Declare a private variable for the bloc.
- Get the instance in
initState(). - Dispose of the bloc in
dispose(). - Dispatch the
MovieLoadEventininitState(), because as soon as we land on this screen we will get the movie details from the API based onmovieIdfromMovieDetailArguments. - In this
build(), wrap theContainerwidget withBlocBuilder. - Since we have the
BlocBuilder, we must also provide the Bloc down the tree so that the child widgets can use that bloc. So, wrapBlocBuilderwithBlocProviderand provide the value as_movieDetailBloc. - This whole screen should be in a
Scaffold. - Comeback to
BlocBuilderto handle the states. For now, just write if-else statements to handle the loaded and error state. For the rest of the states, we showSizedBox.shrink().
Run the app now and tap on any movie card. You'll navigate to the movie detail screen with the primary color as the screen color. This is because we have added vulcan as scaffoldBackgroundColor in the ThemeData.
Big Poster
Let's create a UI for the Big Image that we have on the details screen.
In the
MovieDetailScreen, useColumnfor the success state:
//1
final movieDetail = state.movieDetailEntity;
//2
return Column(
  mainAxisSize: MainAxisSize.min,
  crossAxisAlignment: CrossAxisAlignment.stretch,
  children: [
    //3
    BigPoster(
      movie: movieDetail,
    ),
  ],
);
- Take the
MovieDetailEntityout of the state to use it in the further UI. - Use
Columnto layout elements in vertical order. - We will put the top part of this screen in a separate widget -
BigPoster.
In the same folder, create a new widget file - big_poster.dart:
//1
class BigPoster extends StatelessWidget {
  //2
  final MovieDetailEntity movie;

  //3
  const BigPoster({
    Key key,
    @required this.movie,
  }) : super(key: key);

  @override
  Widget build(BuildContext context) {
    return Container();
  }
}
- Create a
Statelesswidget. - This widget cannot run without movie details, so declare a final field of
MovieDetailEntitytype. - Also, make sure that the movie details are a required field.
Update the
build()by adding Image:
//2
Container(
  foregroundDecoration: BoxDecoration(
    //3
    gradient: LinearGradient(
      //4
      begin: Alignment.topCenter,
      end: Alignment.bottomCenter,
      colors: [
        Theme.of(context).primaryColor.withOpacity(0.3),
        Theme.of(context).primaryColor,
      ],
    ),
  ),
  //1
  child: CachedNetworkImage(
    imageUrl: '${ApiConstants.BASE_IMAGE_URL}${movie.posterPath}',
    width: ScreenUtil.screenWidth,
  ),
)
- You'll start with using
CachedNetworkImagewithposterPath. As the backdropPath is horizontal so we will use posterPath only. - We will show the name of the movie and release date at the bottom of this image, so we will require some overlay on top so that irrespective of any image, the title is visible. So, wrap this image with
Containerand give aforegroundDecoration. - Use
LinearGradientwith 2 colors, the first one being a little transparent with 0.3 opacity. We will use primary color for this. - By default, the direction of the gradient is from left-center to right-center. So, give begin and end explicitly as we should have darker color at the bottom side of the image.
ListTile
Now, we'll add the title, release date, and average vote.
Using Stack, we will use
ListTileover theBigPoster. Put thePositionedwidget below theBigPoster:
//1
Positioned(
  left: 0,
  right: 0,
  bottom: 0,
  //2
  child: ListTile(
    //3
    title: Text(
      movie.title,
      style: Theme.of(context).textTheme.headline5,
    ),
    //4
    subtitle: Text(
      movie.releaseDate,
      style: Theme.of(context).textTheme.greySubtitle1,
    ),
    //5
    trailing: Text(
      movie.voteAverage,
      style: Theme.of(context).textTheme.violetHeadline6,
    ),
  ),
),
- We want to use the full width, so give left and right as 0. Also, give the bottom 0, because we want to position every text at the bottom of
BigPoster. ListtTileis the best widget that can be used here as we need a title, description, and trailing widgets in the same positions.- We will show the title of the movie first. Give it the
headline5widget. - In the subtitle, we will show
releaseDatebelow the title. Give itgreySubtitletext style, will create it in just a moment. - Now, at the rightmost of the list tile, we need to show the vote average. Give
violetHeadline6as text style.
Open theme_text.dart and add 2 text styles in the extensions:
//1
TextStyle get greySubtitle1 => subtitle1.copyWith(
  color: Colors.grey,
);

//2
TextStyle get violetHeadline6 => headline6.copyWith(
  color: AppColor.violet,
);
- By copying everything in
subtitle1and changing just the color, we will create a new text style. - Similarly, copy all properties of
headline6and change to color toviolet.
You might be wondering, why extensions are created in the first place. Because text theme has text styles based on font sizes, not based on colors. So, when we have to use the same text styles with different colors, it should be easier and consistent throughout the app. By creating an extension on TextTheme you can call these text styles by Theme.of(context).textTheme.greySubtitle1. This will help us when we add multiple themes and dark modes to the application.
Convert to Percentage
We need one more extension, this time on number though. The vote average that is returned by the API is in decimals and we want to convert it to %.
Call
convertToPercentageStringonvoteAverageand create num_extensions.dart in common/extensions folder:
extension NumExtension on num {
  //1
  String convertToPercentageString() {
    return ((this ?? 0) * 10).toStringAsFixed(0) + ' %';
  }
}
- This method will multiple by 10 and then remove any further decimals. After this, we will append the % sign.
Movie Detail App Bar
In the BigPoster widget, add another element in Stack at the end.
//1
Positioned(
  left: Sizes.dimen_16.w,
  right: Sizes.dimen_16.w,
  top: ScreenUtil.statusBarHeight + Sizes.dimen_4.h,
  child: MovieDetailAppBar(),
),
- Use
Positionedwith some margin from left and right. From top, consider using thestatusBarHeightfromScreenUtil. AddMovieDetailAppBarthat we will create now.
In the journeys/movie_detail folder, create a new file movie_detail_app_bar.dart:
class MovieDetailAppBar extends StatelessWidget {
  @override
  Widget build(BuildContext context) {
    //1
    return Row(
      //4
      mainAxisAlignment: MainAxisAlignment.spaceBetween,
      children: [
        //2
        Icon(
          Icons.arrow_back_ios,
          color: Colors.white,
          size: Sizes.dimen_12.h,
        ),
        //3
        Icon(
          Icons.favorite_border,
          color: Colors.white,
          size: Sizes.dimen_12.h,
        ),
      ],
    );
  }
}
- Use
Rowto layout elements in horizontal. - Use
arrow_back_iosas the leftmost icon. - Use
favourite_borderas the rightmost icon. - To make these icons have unlimited space in between, use
spaceBetween.
----- add the top position now-----
Use
GestureDetectorto navigate back to the home screen on click of the back arrow:
GestureDetector(
  //1
  onTap: () {
    Navigator.of(context).pop();
  },
  child: Icon(
    Icons.arrow_back_ios,
    color: Colors.white,
    size: Sizes.dimen_12.h,
  ),
)
- Give
onTapand pop out of the screen.
Now, you can navigate back and forth.
Add Overview
The last thing that is left is showing an overview of the movie.
Below
BigPoster, insert the overview of movie:
//1
Padding(
  padding: EdgeInsets.symmetric(
    horizontal: Sizes.dimen_16.w,
  ),
  //2
  child: Text(
    movieDetail.overview,
    style: Theme.of(context).textTheme.bodyText2,
  ),
),
- Use the
Paddingwidget to have proper spacing from left and right. - As a child, use
bodyText2for a movie overview.
This is it from this part, next tutorial will include the remaining of the detail screen with Cast List and Trailers.